")
The transition from drywall installation to final paint application marks the transformation from construction site to livable home. This critical finishing sequence—typically weeks 7-10 in a custom renovation—requires precise coordination to achieve professional results that endure Vancouver’s humid climate. At NRGTEK Construction, we guide homeowners through this process to ensure seamless quality and lasting beauty.
Understanding this sequence empowers you to monitor progress, spot issues early, and make informed decisions about materials and timelines. Proper execution prevents callbacks, enhances durability, and maximizes your investment.
Why the Finishing Sequence Demands Precision
Once rough-ins (plumbing, electrical, HVAC) pass inspection, drywall closes the walls permanently. Mistakes here become invisible—and expensive to fix. The sequence balances drying times, surface prep, and trade coordination while protecting prior work like flooring or cabinetry.
Vancouver’s moisture challenges demand extra attention: poor taping leads to cracking, inadequate priming traps moisture, and rushed painting peels in our wet winters.
Step 1: Drywall Installation and Taping
Hang drywall sheets (4×8 or 4×12 panels) with screws 12″ apart on edges, 16″ in fields. Seams stagger for strength.
Apply joint compound in stages:
-
Bedding coat: Fill joints, embed tape
-
Second coat: Feather 6-8″ beyond first
-
Finish coat: Feather 12″+ for invisible seams
Drying time: 24-48 hours per coat in BC humidity. Sand between coats (120-220 grit).
Pro tip: Use setting-type compounds (hot mud) for faster turns in wet climates.
Step 2: Texturing (Optional but Popular)
Apply knockdown, orange peel, or smooth textures after final sanding. Spray equipment ensures uniformity.
Vancouver favorite: Light knockdown complements Craftsman and West Coast modern aesthetics.
Dry 24 hours before priming. Skip for sleek contemporary finishes.
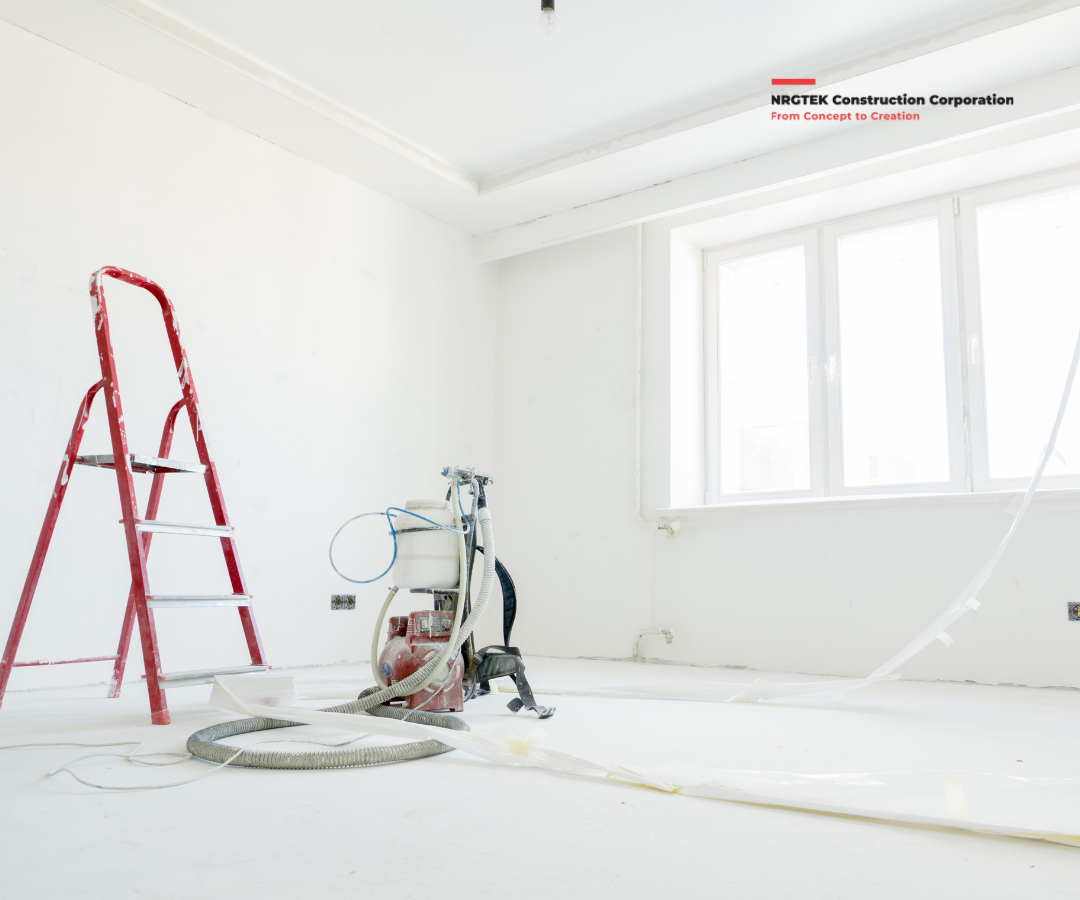
Step 3: Dust Control and Surface Prep
Critical clean-up: Shop-vacs remove all dust—failure here ruins paint adhesion.
-
Vacuum walls, floors, ceilings
-
Tack cloth final wipe
-
Mask floors, trim, windows
Caulk gaps: Baseboards, windows, outlets (acrylic latex, paintable).
Step 4: Priming—The Foundation
Apply primer/sealer (PVA for new drywall, oil-based for stains):
-
Two coats minimum
-
Back-roll for penetration
-
4-6 mil dry film thickness
Why prime? Seals porous drywall, blocks tannins, ensures topcoat uniformity.
Step 5: Final Paint Application
Two topcoats (eggshell/satin for walls, semi-gloss for trim):
-
Cut-in edges first
-
Roll “W” pattern, overlap wet edges
-
Dry 4-6 hours between coats
Vancouver spec: Zero-VOC paints handle humidity; mildew-resistant formulas for bathrooms.
Quality Assurance and Protection
Final inspection: Check for holidays (missed spots), lap marks, or telegraphing cracks. Touch-up before reveal.
Protect new surfaces: Re-install trim, hardware, and fixtures carefully. Avoid cleaning for 30 days.
The Professional Difference
Executing this sequence flawlessly requires experience, the right tools, and climate knowledge. Homeowners who understand the process partner better with contractors, avoid common pitfalls, and achieve superior results.
NRGTEK Construction specializes in precision finishing that elevates Vancouver renovations from good to exceptional.
Ready to complete your perfect finish? Contact NRGTEK Construction today for expert drywall-to-paint execution in your custom renovation.